Nikon COOLPIX S5300 Bedienungsanleitung
Stöbern Sie online oder laden Sie Bedienungsanleitung nach Nein Nikon COOLPIX S5300 herunter. Nikon COOLPIX S5300 Quick start guide Benutzerhandbuch
- Seite / 44
- Inhaltsverzeichnis
- LESEZEICHEN
- Quick Start Guide 1
- Nikon User Support 2
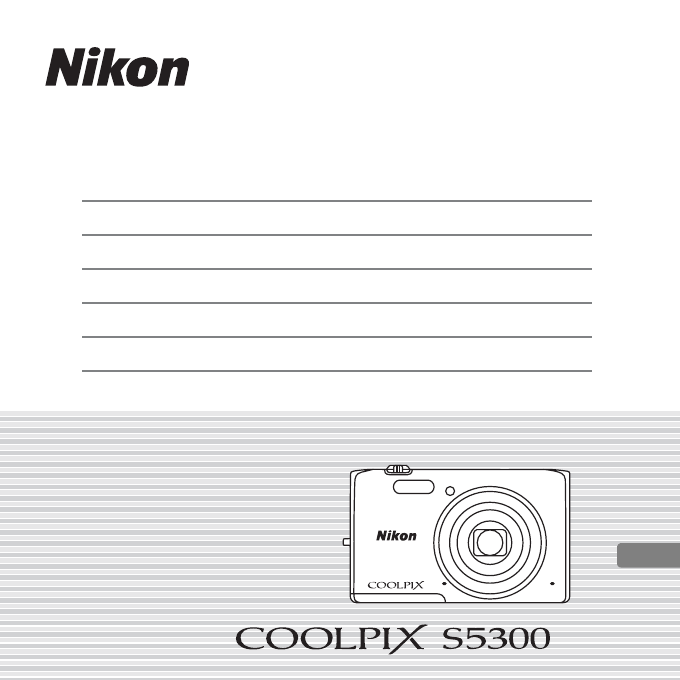
- Parts of the Camera 4
- 2 Insert the battery 6
- 3 Insert the memory card 6
- 3 Charge the Battery 8
- 4 Turn On the Camera 10
- BackBack 11
- First Steps 12
- Shooting and Playback 14
- 2 Frame the picture 15
- 3 Focus and Shoot 16
- Deleting Unwanted Images 18
- Using ViewNX 2 19
- B Connecting the USB Cable 21
- .3 Terminate the connection 22
- 3 Viewing Images 23
- Other Functions 24
- Selecting a Shooting Mode 25
- Scene auto selector 25
- Selecting a Playback Mode 26
- Recording Movies 26
- Auto sort 26
- Using Camera Menus 27
- Shooting menu 27
- For Your Safety 30
- Notices for Customers in 34
- CAUTIONS 35
- Caring for the Camera 36
- B Notes About the Monitor 37
- B About the Manuals 37
- Before Taking Important 38
- Disposing of Data Storage 38
- Wi-Fi (Wireless LAN 39
- Network) 39
- 6MN38111-01 44
Inhaltsverzeichnis
Confirming the Package Contents3First Steps5Shooting and Playback14Using ViewNX 219Other Functions24For Your Safety30Quick Start GuideEn
First Steps10Step 4 Turn On the CameraPress the power switch.• The monitor turns on.C The Auto Off Function• The time that elapses before the camera e
First Steps11Step 5 Select a Language and Set the Camera ClockWhen the camera is turned on for the first time, the language-selection screen and the d
First Steps125.4Select the date format and press the k button.5.5Edit the date and time.• Select a field: Press JK (changes between M, D, Y, hour, and
First Steps13C Imprinting the Date and Time on Images While Taking ImagesAfter setting the date and time, enable the Print date option in the z (setup
Shooting and Playback14Step 1 Check the Battery Level and the Number of Exposures RemainingBattery Level IndicatorNumber of Exposures RemainingC is di
Shooting and Playback15Step 2 Hold the Camera and Frame a Picture2.1 Hold the camera steady in both hands.• Keep fingers and other objects away from t
Shooting and Playback16Step 3 Focus and Shoot3.1 Press the shutter-release button halfway, i.e., press the button lightly until you feel a slight resi
Shooting and Playback173.2 Without lifting your finger, press the shutter-release button the rest of the way down to take the picture.• The shutter is
Shooting and Playback18Deleting Unwanted ImagesTo delete the image currently displayed in the monitor, press the l (delete) button.When the deletion s
Using ViewNX 219Install ViewNX 2 to upload, view, edit, and share photos and movies.Step1 Installing ViewNX 2An Internet connection is required.For sy
2Thank you for purchasing the Nikon COOLPIX S5300 digital camera. This guide introduces the procedures necessary for first time use of this camera. To
Using ViewNX 2201.3 Follow the on-screen instructions to install the software.1.4 Exit the install.• Windows: Click Yes .• Mac: Click OK.Step 2 Transf
Using ViewNX 221• SD card slot: If your computer is equipped with an SD card slot, the card can be inserted directly in the slot.• SD card reader: Con
Using ViewNX 2222.2 Transfer images to the computer.• Click Start Transfer.• At default settings, all the images on the memory card will be copied to
Using ViewNX 223Step 3 Viewing ImagesStart ViewNX 2.• Images are displayed in ViewNX 2 when transfer is complete.• Consult online help for more inform
Other Functions24Flash Mode, Self-Timer, Macro Mode, and Exposure CompensationUse the multi selector in shooting mode to apply the following settings.
Other Functions25Selecting a Shooting ModePress the A button in shooting mode to display the shooting mode selection menu.Select a shooting mode with
Other Functions26Selecting a Playback ModePress the c button in playback mode to display the playback mode selection menu.Select a playback mode with
Other Functions27Using Camera MenusA variety of shooting and playback settings can be adjusted from the camera menus. Press the d button to display th
Other Functions28Playback ModeThe following options are available in full-frame playback mode.To Use DescriptionSelect imagesUse the multi selector HI
Other Functions29Switch to another playback modecDisplays the playback mode selection menu, allowing you to switch to favorite pictures mode, auto sor
Confirming the Package Contents3In the event that any items are missing, please contact the store where you purchased the camera.* A plug adapter is i
For Your Safety30To prevent damage to your Nikon product or injury to yourself or to others, read the following safety precautions in their entirety b
For Your Safety31Do not use the camera or Charging AC Adapter in the presence of flammable gasDo not use electronic equipment in the presence of flamm
For Your Safety32• When inserting the battery, do not attempt to insert it upside down or backwards.• Do not short or disassemble the battery or attem
For Your Safety33• Do not use with travel converters or adapters designed to convert from one voltage to another or with DC-to-AC inverters. Failure t
Notices34Notices for Customers in the U.S.A.IMPORTANT SAFETY INSTRUCTIONS -SAVE THESE INSTRUCTIONS.DANGER - TO REDUCE THE RISK OF FIRE OR ELECTRIC SHO
Notices35• Connect the equipment into an outlet on a circuit different from that to which the receiver is connected.• Consult the dealer or an experie
Notices36Caring for the CameraTo ensure continued enjoyment of this Nikon product, observe the precautions described below in addition to the warnings
Notices37B Do Not Point the Lens at Strong Light Sources for Extended PeriodsAvoid pointing the lens at the sun or other strong light sources for exte
Notices38Before Taking Important ImagesBefore taking images on important occasions (such as at weddings or before taking the camera on a trip), take a
Notices39Wi-Fi (Wireless LAN Network)This product is controlled by the United States Export Administration Regulations, and you are required to obtain
Confirming the Package Contents4Parts of the Camera1Power switch/power-on lamp2Charge lamp/flash lamp3Zoom control4Shutter-release button5b (e movie-r
Notices40FCC/IC RF Exposure StatementThis transmitter must not be co-located or operated in conjunction with any other antenna or transmitter.The avai
Notices41Precautions when Using Radio Transmissions• Always keep in mind that radio transmission or reception of data is subject to interception by th
Notices42AVC Patent Portfolio LicenseThis product is licensed under the AVC Patent Portfolio License for the personal and non-commercial use of a cons
Notices43• Android and Google Play are trademarks or registered trademarks of Google, Inc.• All other trade names mentioned in this manual or the othe
YP3L01(11)6MN38111-01
First Steps5Step 1 Attach the Camera StrapStep 2 Insert the Battery and Memory CardIf a memory card is inserted in the camera, image’s data is saved o
First Steps62.2 Insert the battery.• Push the orange battery latch in the direction indicated by the arrow (1), and fully insert the battery (2).• The
First Steps72.4 Close the battery-chamber/memory card slot cover.Removing the Battery and Memory CardTurn the camera off and make sure that the power-
First Steps8Step 3 Charge the BatteryUse the included Charging AC Adapter and USB cable to charge the battery while it is in the camera.3.1 Prepare th
First Steps93.2 Make sure the battery is installed in the camera, and then connect the camera to the Charging AC Adapter in order of 1 to 3.• Make sur
Weitere Dokumente für Nein Nikon COOLPIX S5300


Verwandte Produkte und Handbücher für Nein Nikon COOLPIX S5300
 (147 Seiten)
(135 Seiten)
(2 Seiten)
(236 Seiten)
(156 Seiten)
(212 Seiten)
(44 Seiten)
(48 Seiten)
(230 Seiten)
(147 Seiten)
(135 Seiten)
(2 Seiten)
(236 Seiten)
(156 Seiten)
(212 Seiten)
(44 Seiten)
(48 Seiten)
(230 Seiten)
 (202 Seiten)
(2 Seiten)
(92 Seiten)
(144 Seiten)
(68 Seiten)
(92 Seiten)
(202 Seiten)
(2 Seiten)
(92 Seiten)
(144 Seiten)
(68 Seiten)
(92 Seiten)
 (160 Seiten)
(148 Seiten)
(180 Seiten)
(1 Seiten)
(48 Seiten)
(160 Seiten)
(148 Seiten)
(180 Seiten)
(1 Seiten)
(48 Seiten)
© 2020, manymanuals.de. Alle Rechte vorbehalten. | 1.622 s |
 Manymanuals.com
 Manymanuals.de
 Manymanuals.fr
 Manymanuals.it
 Manymanuals.pl
 Manymanuals.cz
 Manymanuals.es
 Manymanuals-pt.com
Kommentare zu diesen Handbüchern