Use of Iris Camera – MEC-2-CB-D60-N105 9
10. Always take all the right eye pics first
then all the left eye pics. If you take scleral pics, start with
the iris of that eye, followed by the four quadrants of the sclera (normally Left, Right, Upper,
Lower).
11. Adjust the camera position until the pupil of the iris is centered on the viewfinder. With this type of
1:1+ photography, focus is accomplished by moving the camera toward or away from the subject.
12. Adjust focus until the image is sharp around the collarette at the four cardinal points.
13. Take picture.
14. Check exposure. The image may appear differently on the monitor than the LCD viewer.
15. Use exposure bracketing by Aperture. Normally, it is best to take a sequence of images of each
eye, and bracket the exposure by using a range of aperture values. Typically for a blue iris the
range would by 29, 32, 36; for a brown iris 20, 22, 25. Use increasing numeric aperture numbers
for the right eye, then the same sequence but in decreasing order for the left iris.
16. To increase the exposure (with the Nikon D-60), adjust the Aperture using the main (rear)
Command dial. Note: If the just-taken image is showing, you must press the picture-taking
button slightly (or press the play button) to stop the image playback before adjusting
aperture. Aperture will not change if an image is being displayed. The aperture will only change
when the playback is stopped.
For brown irises, the image should be overexposed
to bring out the low-contrast detail.
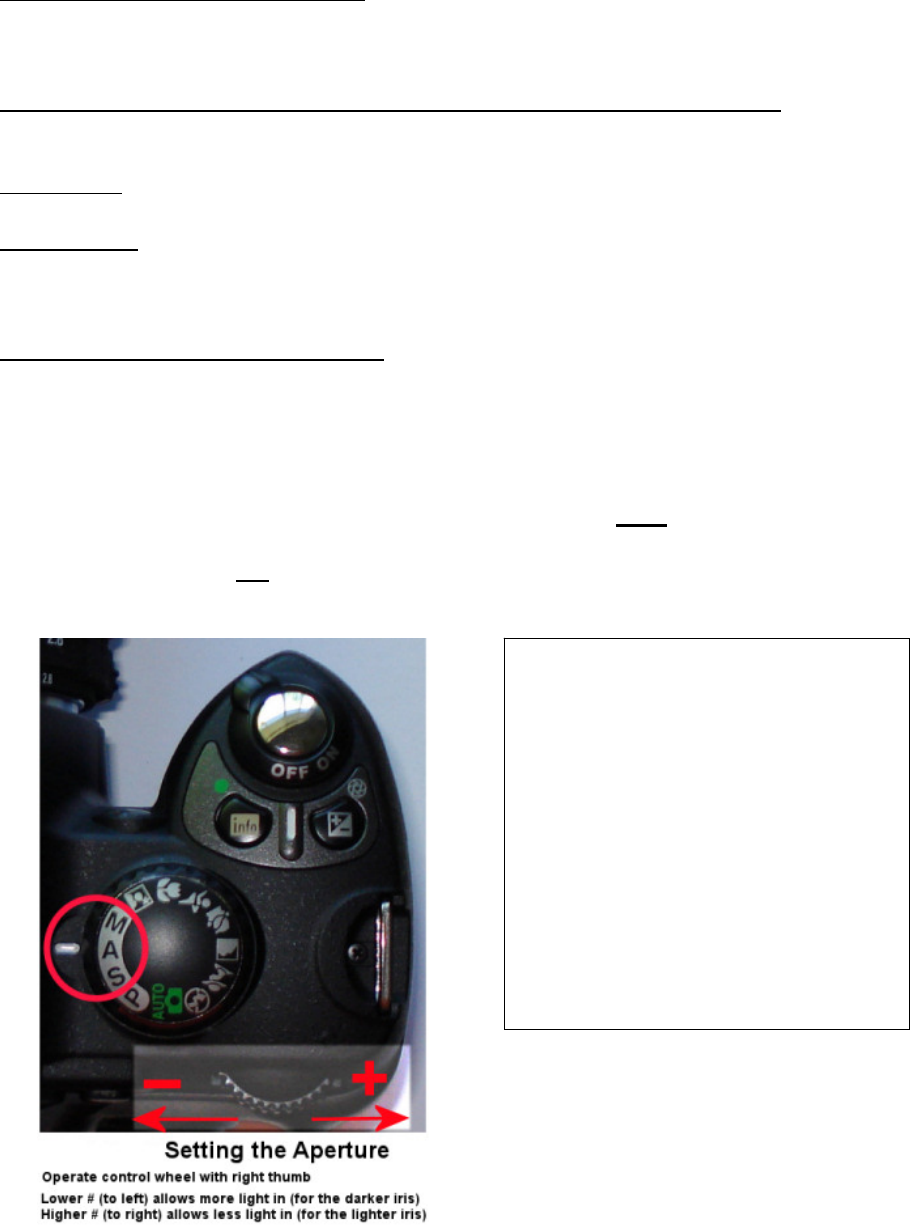
For Blue iris use aperture 29, 32, 36, 40, 45, or 51
For Brown iris use aperture 18, 20, 22, 25, 29, or 32
The aperture dial is operated with the
right thumb. You must discontinue
image playback first (by pressing the
picture-taking button lightly). Rotation
to the right (“outboard”) will increase
the aperture number (less light);
rotation to the left (“inboard”) will
decrease the aperture. To bracket your
exposure, take the right eye (first) with
apertures ranging upwards across 3 or
4 settings, then photograph the left eye
with the aperture ranging downwards
through the same settings.
 (228 Seiten)
 Manymanuals.com
 Manymanuals.de
 Manymanuals.fr
 Manymanuals.it
 Manymanuals.pl
 Manymanuals.cz
 Manymanuals.es
 Manymanuals-pt.com
Kommentare zu diesen Handbüchern