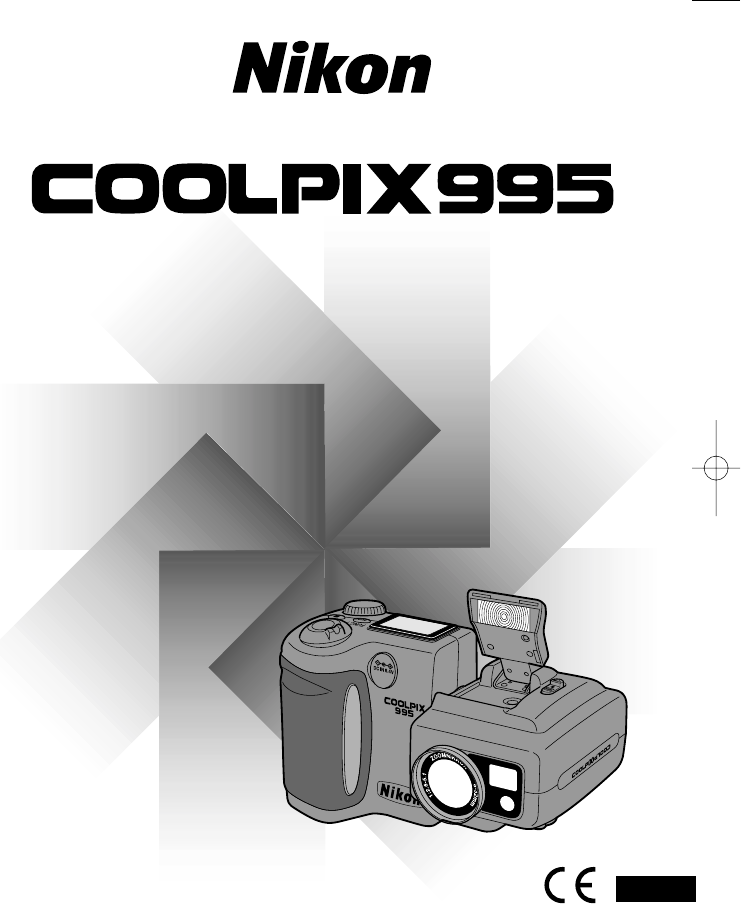
Nikon 995 Bedienungsanleitung
Stöbern Sie online oder laden Sie Bedienungsanleitung nach Kameras Nikon 995 herunter. Nikon 995 User Manual Benutzerhandbuch
- Seite / 91
- Inhaltsverzeichnis
- FEHLERBEHEBUNG
- LESEZEICHEN
- DIGITAL CAMERA 1
- Before Using the 2
- For Your Safety—continued 3
- Contents 7
- Nomenclature 8
- Nomenclature—continued 9
- Quick Guide 10
- Quick Guide—continued 11
- Menu Guide: Shooting Mode 12
- Menu Guide: Playback Mode 14
- PREPARATION 15
- Installing Battery 16
- Selecting a Language 17
- Setting Date/Time 18
- Inserting CF Memory Card 19
- Formatting CF Memory Cards 20
- Useful Advice on 21
- COOLPIX Camera 21
- Techniques 21
- Holding the Camera 22
- Simple Shooting and 23
- Playback 23
- Basic Operation (Auto Mode) 24
- ∂ (Quick 25
- —continued 26
- Check points: 26
- Self-Timer Operation 27
- Simple Playback Operations 28
- Detailed Operations 29
- Shooting Mode 30
- Image Quality 30
- Image Size 30
- Check point 30
- Selecting the Focus Mode 31
- Digital zoom 32
- P: Programmed Auto 33
- A: Aperture-Priority Auto 34
- Â: Manual 34
- S: Shutter-Priority Auto 34
- Setting the Flash Mode 35
- Shooting Mode Shooting Mode 36
- Adjusting Sensitivity 37
- Playback—continued 39
- Deleting photographs 39
- Advanced operation 40
- Manual Focus 41
- ∂ is not 43
- Using the Camera 46
- Setting Shooting Menus 47
- Notes: Best Shot Selector 52
- Setting Shooting SET-UP Menus 61
- Note: PAL video mode 68
- Note: Disable Delete 68
- Playback Menus 69
- Playback Menus—continued 70
- Playback Mode ˘ 73
- Playback SET-UP Menus 75
- Playback SET-UP Menu items 76
- Connections 77
- Connecting to a computer 79
- Miscellaneous 81
- Optional Accessories 82
- Caring for Your Camera 83
- Troubleshooting 84
- Error Messages 85
- Error Messages—continued 86
- Specifications 87
- Specifications—continued 88
- Index—continued 90
- NIKON CORPORATION 91
Inhaltsverzeichnis
The Nikon Guide to Digital Photography with theEDIGITAL CAMERACOOLPIX995 (E) 01.5.30 0:37 PM Page 1
Quick Guide18 19This section will rapidly guide you through the first steps, from settingup the camera to taking your first picture. For fully detaile
21Quick Guide—continued 205Press the Shutter release button lightly to focus on the subject byusing autofocus. (p. 48).•The Green LED lights when the
23Menu Guide: Shooting Mode22Press MENUbutton to select.Press the Multiselector to switchbetween Shootingmenu 1 and 2.Shooting Menu 1WHITE BALANCESel
25Menu Guide: Shooting Mode 24Press MENUbutton and Multiselector to select.Press the Multiselector to switchbetween SET-UPmenu 1 and 2.SET-UP 1()FOLD
27Menu Guide: Playback Mode 26Press MENUbutton to select.Press the Multiselector to switchbetween Playbackmenu and SET-UPmenu.DELETEDelete selected i
2928PREPARATIONThis section introduces preparations necessarybefore using the camera.Check listCheck that all the components listed below are included
31Installing Battery30The camera requires either the supplied Li-ion Rechargeable Battery ora 2CR5 (DL245) 6V lithium battery (available separately).
3332Selecting a LanguageThe language in which menus and messages are displayed can beselected using the Language sub-menu.1Turn the Mode dial to ˘.•Th
34 35Setting Date/TimeThe date and time for your country or location should be set beforeuse.1Set the Mode dial to and press the MENU button to displ
37Inserting CF Memory Card36The COOLPIX995 uses a CompactFlash™ (CF) memory card to storeimages and movies.Use a Nikon CF memory cards or other recomm
For Your Safety 2 3This section contains important safety information. Read this section inits entirety before using your COOLPIX995 or the software p
39Formatting CF Memory Cards38CF memory cards must be formatted before being used with theCOOLPIX995. Note that the CF memory card supplied with yourc
41Strap and Lens Cap40Attaching strapMODESIZEISOM-FOCUS•Attach the strap as illustrated.Lens cap•Press the latch on the lens cap to attach/detach it.•
Holding the Camera42 43To reduce blurring caused by camera shake, hold the camera steadilyin both hands and press the Shutter release button slowly an
45Mode Dial and Multi Selector 44Simple Shooting andPlaybackHaving mastered simple point operation andstudied the section “Useful Advice on COOLPIXCam
47Basic Operation (Auto Mode)461Set the camera to Auto Mode (Set the Mode dial to ).•The camera beeps once when the power is turned on and standby op
49Basic Operation (Auto Mode)—continued483Lightly press the Shutter release button and confirm the focus.Note: Continuous AFWhen the Monitor is on, th
51Basic Operation (Auto Mode)—continued50Built-in SpeedlightUse the built-in Speedlight if there is insufficient light to illuminate the subject.This
Self-Timer Operation 53Basic Operation (Auto Mode)—continued526Press the Delete button in Full-screen review mode and select“Yes” with the Multi selec
55Simple Playback Operations54Set the Mode dial to ˘ to set the camera to Playback mode. InPlayback mode, recorded images are visible on the Monitor.
57Other Functions 56By connecting the camera to your TV set or a personal computer, youcan view, edit or print out images taken with the COOLPIX995.Co
For Your Safety—continued4 5Observe proper precautions when handling the batteryThe battery may leak or explode if improperly handled. Observe the fol
59Setting Image Quality and Size58Shooting Mode In both or mode, one of the most important options for yourpictures is the combination of Image qual
Selecting the Focus ModeHow Much Space is Left on my CF Memory Card—Confirming the Number of Exposures Remaining60Shooting Mode The total number of im
Digital zoom63Selecting Focus Mode—continued62Shooting Mode Shooting Mode Autofocus OptionsThere are several advanced options that may be employed wh
65Setting the Exposure mode64Shooting Mode To create a variety of photographic treatments, various Exposuremodes can be selected to achieve a desired
67Setting the Exposure mode—continued66Shooting Mode A: Aperture-Priority AutoThis mode enables you to choose the camera aperture (lens’ minimum tomax
Setting the Flash Mode69Setting the Exposure mode—continued68Shooting Mode Long time (BULB) exposure (up to 60 sec.)Å Set the Exposure mode to Â, and
Setting the Exposure Compensation Value71Setting the Flash Mode—continued70Shooting Mode Shooting Mode Setting Indication CharacteristicsAUTO flash⁄S
73Adjusting Sensitivity72Shooting Mode Sensitivity increases the use that the camera makes of available light,allowing faster shutter speeds to be emp
7574PlaybackPlayback Mode ˘You can see more detail in the image by zooming into the desired areaof the image.Taking a Closer Look: Zooming In1Set the
77Playback—continued76Playback Mode ˘By pressing the Delete (D) button in Full-frame playback or ThumbnailPlayback you can delete individual images.De
For Your Safety—continued6 7Do not dropThe product may malfunction if subjected to strong shocks or vibration. Attachthe strap (p. 40) and lens-cap co
7978Advanced operationThis section provides complete descriptions ofadvanced camera operations.Deleting Individual Photographs in Thumbnail Playback1H
Manual Focus81Autofocus Lock/Auto Exposure Lock80If the subject is outside of the Autofocus area, a feature calledAutofocus lock can be used to mainta
Recording Movie/Movie Playback83Situations Where Autofocus May not Work as Expected82Shooting Mode Autofocus does not perform well under the condition
Quick Delete/Holding the Image in the Display85Recording Movie/Movie Playback—continued84Operation in Movie Playback modeWhen the first frame is displ
87Quick Review Mode/Full-Screen Review Mode86Shooting Mode Quick review mode/Full-screen review mode is set by pressing theQUICK review button in Sho
89Viewing Additional Picture Information88Rotating the Command dial changes the display to the following fivescreens while a picture is displayed on t
91Sync Terminal90External Nikon Speedlights can be accommodated by using theoptional Multi-Flash Bracket Unit SK-E900.1Remove the Sync terminal cover
93Choosing from the Shooting Menu (example: Focus Mode)1Select the Shooting menu item.•Press ≤/≥ on the Multi selector to highlight the desired menu i
9594Setting Shooting Menus—continuedShooting Mode If the symbol (Command dial) appears to the right of a menu item, you canselect an option quickly b
97Setting Shooting Menus—continued96Shooting Mode — Preset White Balance —In certain lighting, you may find that you can obtain a more accurate color
For Your Safety—continued8 9Notice Concerning Prohibition of Copying orReproductionNote that simply being in possession of material that has been digi
9998Setting Shooting Menus—continuedShooting Mode •When you set the Metering mode, the Metering indications are displayed on theControl panel and on t
101100Setting Shooting Menus—continuedShooting Mode * The shooting speed varies with the memory available in the camera.•Once shooting has commenced,
103102Setting Shooting Menus—continuedShooting Mode BEST SHOT SELECTORThe Best Shot Selector function is most effective in situations whereinadvertent
105104IMAGE ADJUSTMENTWhen you take a photograph, the camera automatically compensatesfor optical brightness and contrast before recording the photogr
107106Normal Normal settingWide Adapter Wideangle Converter settingTelephoto 1 2x Telephoto Converter TC-E2 settingTelephoto 2 3x Telephoto Converter
109108USER SETTINGThe camera can “memorize” up to three combinations of settings,including White Balance, Metering, Continuous, Best Shot Selector,Ima
111110Setting Shooting Menus—continuedShooting Mode — Exposure Compensation —Exposure metering can be offset to allow manual compensation formore crea
113112Setting Shooting Menus—continuedShooting Mode — Auto-Focus Mode —The camera Auto-Focus can operate in two modes: Continuous AFand Single AF.Cont
115114Setting Shooting Menus—continuedShooting Mode IMAGE SHARPENINGThe camera can emphasize the details and borders of objects, makingthe picture app
117116Setting Shooting Menus—continuedShooting Mode •The Exposure Compensation indication ≠ flashes on the Control panel and along with the compensate
Introduction About This Manual10 11Thank you for purchasing the Nikon COOLPIX995 digital camera—acamera that is sure to make photography a bigger part
119118RESET ALLThe Reset all setting allows you to restore settings in all Shootingmodes , and Playback ˘ to their default values.No Exit menu withou
3Press ≤/≥ to display SET-UP 2 at the top of the screen.•The 14 SET-UP items are divided into two displays. Press ≤/≥ on the Multiselector to move the
123122Setting Shooting SET-UP Menus—continuedFoldersThe Shooting SET-UP Items (in mode)You can use this option to select new folders to help you orga
124Setting Shooting SET-UP Menus—continuedShooting Mode [Delete]This option enables you to delete folders (other than the NIKON folder).1Select “Delet
127126— Hue —The hue (overall color) of the Monitor can be finely adjusted to any ofeleven levels.Press≤ or ≥ to alter the hue by moving the arrow at
129128Setting Shooting SET-UP Menus—continuedShooting Mode Seq. NumbersIn order to avoid taking multiple pictures with the same file name (forexample
131130Setting Shooting SET-UP Menus—continuedShooting Mode ControlsShooting SET-UP Items (only in mode)You can use the Controls setting to specify wh
133132Zoom OptionsYou can use the Zoom Options to determine various functions that relate to theinitial set up of the lens and the aperture variations
135134— Shot Confirm Lamp —With the Shot Confirm Lamp setting On, the Red-eye reduction/Self-timer lamp next to lens lights each time a single picture
137Playback Menus136Playback Mode ˘The Playback mode has two pages of settings which are controlledfrom the Playback menu (Page 1) and Playback SET-UP
Contents12 13Before Using the Camera...2-27For Your Safety...
139138Playback Menus—continuedPlayback Mode ˘Playback MenuDeleteSaved photographs, the settings of Auto Transfer and Print-order filescan be deleted.
141140Playback Menus—continuedPlayback Mode ˘FoldersThe Folders option in the Playback menu can be used to selectimages in all folders for playback, o
142Playback Menus—continuedPlayback Mode ˘ProtectThe Protect option can be used to prevent recorded images in the CFmemory card from being deleted.— P
145144Playback SET-UP Menus—continuedPlayback Mode ˘Print SetThe Digital Print Order Format (DPOF) allows images to be marked forprinting at a Lab, Pr
147146Playback Menus—continuedPlayback Mode ˘Auto TransferThe Auto Transfer setting controls whether or not the Nikon View 4software will automaticall
149148Playback SET-UP MenusPlayback Mode ˘Displaying the Playback SET-UP MenuIn the Playback SET-UP menu, you can make changes to basic camerasettings
151150Playback SET-UP Menus—continuedPlayback Mode ˘Monitor OptionsPlayback SET-UP Menu itemsThe hue (overall color) and brightness of the Monitor can
153152LanguageThe camera menus and messages can be viewed in one of a numberof languages.D GermanE EnglishF FrenchJ JapaneseS Spanish•For information
155154Connecting to a television or VCRConnecting to an AC Adapter (optional)1Open the DC-in connector cover as indicated.2Set the Mode dial to , and
157Connecting to a computer156Although it is not necessary to own or use a computer to enjoy digitalimages from your COOLPIX, a computer greatly enhan
Nomenclature14 15MODE1011121314161517 1819202122 231234567891 Viewfinder p. 162 Red-eye reduction/Self-timer lamp p. 70/533 Lens4 MONITOR button p.
159158Connecting to a computer—continued1Insert the CF memory card into the EC-AD1 PC-card adapter, CFcard reader etc. of your computer.CompactFlash C
161MiscellaneousThis chapter provides information on optionalaccessories and advice on troubleshooting, and liststhe specifications of the camera.160C
163162Optional AccessoriesWideangle Converter WC-E63When the WC-E63 is attached to the COOLPIX995, the focal length is reducedby a factor of 0.63X. Th
165164Optional Accessories—continued/Operating ConditionsNotes: Using CF memory cards—continued•Do not attempt to touch the terminals or contacts with
167166TroubleshootingIf the COOLPIX995 is not operating properly, check the following items.If the problem persists, contact the retailer where you bo
169Error Messages168If the following error messages appear on the Monitor or Control panel,please check the possible solutions before ordering repairs
171Error Messages—continued170MonitorControl panelProblem•Overflow of the image number hasoccurred.•CF memory card has formatincompatible with COOLPIX
173SpecificationsType Digital camera E995CCD 1/1.8" high-density CCD, total number of pixels: 3.34millionImage size (pixel) 2,048 x 1,536 (FULL)
175Specifications—continued174Interface USB, video output (NTSC/PAL selectable)I/O terminal DC input, Video output, Digital terminal (USB), Synctermin
177Index1763 : 2 size ...P. 59, 60Shooting mode ...
SLOWAUAUTOW-BAL.AL.ISOSXGASXGAXGAXGAVGAGA3:2M-FOCUSU1112131412345678910Nomenclature—continued16Control Panel(All indications are displayed in the illu
179Index—continued178Language.....p. 32, 135, 152Lens converter...
No reproduction in any form of this manual, inwhole or in part (except for brief quotation incritical articles or reviews), may be made withoutwritten
Verwandte Produkte und Handbücher für Kameras Nikon 995
 (204 Seiten)
(53 Seiten)
(184 Seiten)
(204 Seiten)
(53 Seiten)
(184 Seiten)
 (127 Seiten)
(252 Seiten)
(262 Seiten)
(232 Seiten)
(200 Seiten)
(208 Seiten)
(216 Seiten)
(24 Seiten)
(226 Seiten)
(127 Seiten)
(252 Seiten)
(262 Seiten)
(232 Seiten)
(200 Seiten)
(208 Seiten)
(216 Seiten)
(24 Seiten)
(226 Seiten)
 (2 Seiten)
(103 Seiten)
(180 Seiten)
(84 Seiten)
(240 Seiten)
(220 Seiten)
(164 Seiten)
(226 Seiten)
(2 Seiten)
(103 Seiten)
(180 Seiten)
(84 Seiten)
(240 Seiten)
(220 Seiten)
(164 Seiten)
(226 Seiten)
© 2020, manymanuals.de. Alle Rechte vorbehalten. | 0.936 s |
 Manymanuals.com
 Manymanuals.de
 Manymanuals.fr
 Manymanuals.it
 Manymanuals.pl
 Manymanuals.cz
 Manymanuals.es
 Manymanuals-pt.com
Kommentare zu diesen Handbüchern